
Introduction

Raising baby clownfish from eggs to juveniles is one of the most rewarding challenges in the saltwater hobby. It is also one of the most unforgiving. If you are reading this raising baby clownfish guide, you likely already have a breeding pair or are planning to get one. Either way, you need to know what you are getting into.
This guide covers the entire process from setting up a dedicated rearing tank to weaning juveniles onto prepared foods. I will not sugarcoat the difficulty. Expect mortality rates of 50 to 90 percent in your first few attempts. That is normal. Every experienced breeder has lost batches. The goal is to learn why and improve the next time.
What follows is a practical, step-by-step breakdown based on what actually works in home setups. No fluff. No unnecessary theory. Just the actionable details you need to get from eggs to healthy juvenile clownfish.

Why Raising Baby Clownfish Is Different From Other Fish
Raising clownfish larvae is not like raising guppies or even most marine fish. The larvae are tiny. Really tiny. At hatching, they are about three to four millimeters long and completely transparent. They cannot see well and rely on still water and specific light conditions to find food.
They also have very specific nutritional needs. The first food must be small enough for their mouths and nutritious enough to sustain rapid growth. Rotifers are the standard, but not all rotifers are equal. Enriched rotifers make a massive difference in survival rates.
Lighting is another factor that trips up beginners. Clownfish larvae need dim, indirect light to find rotifers. Too bright and they cannot see. Too dark and they do not feed. You have to dial it in.
Then there is water quality. Fry are extremely sensitive to ammonia and nitrite spikes. Even small fluctuations can wipe out an entire batch overnight. You need stable parameters, gentle flow, and consistent maintenance.
Compared to hardier species like damsels or cardinals, clownfish are not the hardest fish to rear, but they require attention to detail and a willingness to fail a few times. Acknowledge that upfront and you will be better prepared.
Step 1: Setting Up a Dedicated Rearing Tank
You cannot raise clownfish larvae in your main display tank. They need a separate rearing tank with controlled conditions. Here is what you need and why each piece matters.
Tank size: A 10 to 20-gallon tank is standard. Smaller tanks are harder to keep stable. Larger tanks make it harder for larvae to find food. 15 gallons is a sweet spot for most home breeders.
Sponge filter: Use a mature sponge filter. It provides biological filtration without strong suction that would kill larvae. Look for a sponge filter rated for your tank size. Mature it in your main system for at least three weeks before using it in the rearing tank.
Heater: A reliable submersible heater set to 80-82°F. Temperature stability is critical. A cheap heater with poor temperature control can kill your batch. Spend a little more for a reputable brand with an external thermostat.
Lighting: An adjustable LED light that can be dimmed is ideal. You want low, indirect light for the first few days. A simple desk lamp with a dimmer bulb works if you have no other option.
Aeration: Gentle aeration is important for oxygen exchange and keeping rotifers suspended. An air pump with a control valve so you can adjust flow is essential.
Everything in this tank should be dedicated to fry. No substrate, no rocks, no decorations. Just bare glass, a heater, and a sponge filter. This keeps your water parameters predictable and makes cleaning simple.
Step 2: Water Quality and Parameters for Fry
Clownfish fry demand specific water parameters. Get these right and you are most of the way there.
- Temperature: 80-82°F (26.5-28°C). Stability matters more than the exact number
- Salinity: 1.024-1.026 specific gravity. Use a refractometer, not a swing arm hydrometer. A refractometer is more accurate and easier to calibrate
- Ammonia: 0 ppm. Any detectable ammonia is dangerous
- Nitrite: 0 ppm
- pH: 8.1-8.4
Test water daily for the first two weeks. A reliable test kit for ammonia, nitrite, and pH is non-negotiable. I use a liquid reagent kit because strips are not accurate enough for fry rearing.
Common mistake: overcleaning. Do not scrub the tank or change too much water at once. Small, frequent water changes of 10-15% every two to three days are better than large weekly changes. You want stability, not a pristine tank.
Another mistake: too much flow. The sponge filter provides enough circulation for fry. If you add a powerhead, you might push larvae around or create areas they cannot escape. Keep flow gentle.
Step 3: Collecting Viable Eggs From the Breeding Pair
Before you can hatch anything, you need a breeding pair that produces viable eggs. Look for a pair that lays eggs consistently every two to three weeks. Healthy eggs are small, orange, and attached to a flat surface like a tile or PVC pipe.
The egg-laying cycle is predictable. The female lays eggs in the evening. The male fans and cleans them. After five to eight days, the eggs turn silver and you can see the eyes of the developing larvae inside. That is your cue to prepare for hatching.
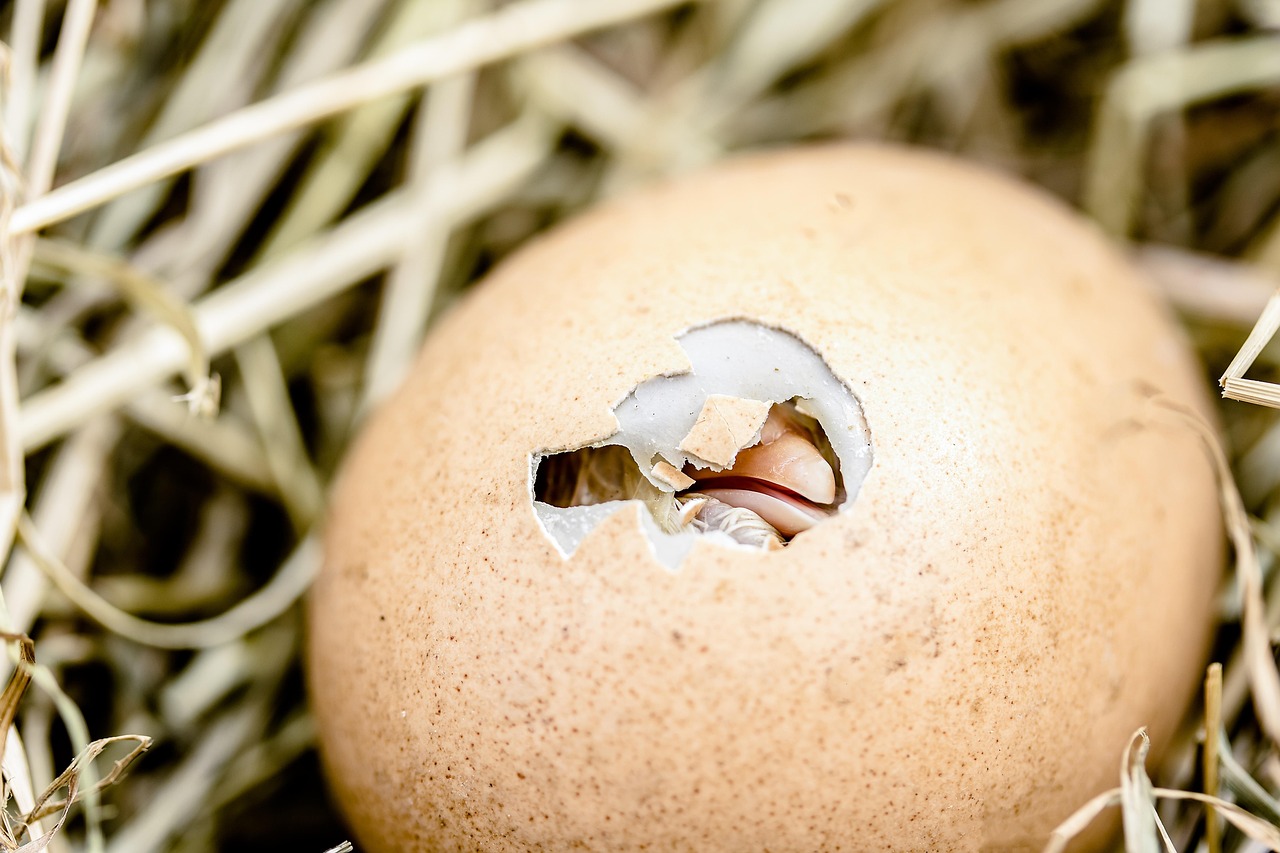
To collect the eggs without damaging them, you need a plan. If your pair lays on a removable tile or piece of PVC, you can gently lift it out and transfer it to the rearing tank. If they lay on a piece of rock or glass, you cannot easily move it. In that case, you can either wait for hatching in the main tank and transfer larvae with a light trap, or remove the entire rock if possible.
Timing matters. Remove the eggs on day five or six, before hatching. If you wait until they are silver, they may hatch during transfer. Place the egg cluster in a small cup of tank water and gently lower it into the rearing tank. Position the eggs near the surface and aim a gentle stream of bubbles at them to simulate the male’s care.
Handle eggs carefully. Do not expose them to air for more than a few seconds. Do not shake or bump them. Rough handling can kill the developing larvae before they even hatch.

Step 4: Hatching Day â What to Expect and Prepare
Hatching usually happens at night, one to three hours after lights go out. The eggs turn silver when they are ready. You will see the eyes clearly through the egg capsule.
On hatching night, dim the lights in the rearing tank. Bright lights can confuse larvae and make it harder for them to feed. A small LED light at the lowest setting is fine.
Have rotifers ready. You need to feed them immediately after hatching. Rotifers should be present in the tank before the fry hatch so they can start eating right away. Target a density of 5-10 rotifers per milliliter.
Common issue: non-hatching eggs. Sometimes a batch fails to hatch. This can be caused by low water quality, wrong temperature, or fungal infection. If the eggs do not hatch after two nights, remove them and try again next cycle.
If the eggs hatch successfully, you should see tiny transparent larvae swimming near the surface. They are fragile. Do not siphon the tank, do not disturb them, and do not add anything else at this point.
Step 5: Feeding Baby Clownfish â Rotifers, Microalgae, and Weaning
Feeding is where most beginners fail. The schedule is specific and requires daily attention.
Days 1-10: Rotifers are the primary food. Keep rotifer density at 5-10 per milliliter. Add green water (live microalgae like Nannochloropsis) to the tank. The green water feeds the rotifers and helps the fry find their food by providing visual contrast. You will need a rotifer culture running continuously to keep up with demand.
Days 10-15: Introduce baby brine shrimp (Artemia nauplii). Start with a small amount and observe whether the fry eat them. Some fry take to brine shrimp quickly; others need more time with rotifers. Feed both rotifers and brine shrimp for a few days to make sure everyone is eating.
Days 15-21: Wean onto prepared foods. Start with powdered fry food small enough for their mouths. Sprinkled on the surface, it should be eaten within a few minutes. Reduce rotifer and brine shrimp feedings gradually over a week.
After day 21: Gradually transition to finely crushed flake or pellet food. Juveniles at this stage are more robust and can handle larger particles.
Enriching rotifers and brine shrimp with products like Selcon or Algamac significantly improves larval health. Unenriched prey leads to nutritional deficiencies and higher mortality.
Comparing Live Food Options for Clownfish Larvae
You have several options for feeding clownfish larvae. Each has tradeoffs in cost, difficulty, and nutritional value.
Rotifers: The standard for the first 10 days. Cheap to culture but require daily maintenance and consistent harvesting. A single culture can feed multiple batches if sized correctly. Rotifers need enrichment for optimal nutrition. Best for: beginners and anyone raising more than a few batches.
Copepods: Higher nutritional value than rotifers. Some copepod species are small enough for clownfish larvae. However, they are harder to culture at the densities needed for large batches. Best for: experienced breeders looking for higher survival rates.
Baby brine shrimp: Easy to hatch from cysts. High in protein but low in essential fatty acids unless enriched. Best used as a supplement after day 10, not as a primary food. Best for: weaning and boosting growth.
Artificial fry food: Powders designed to replace live food entirely. Convenient but less effective. Most clownfish larvae reject them in the first week. Best for: experienced breeders as a supplement, not a replacement.
For most home breeders, rotifers are the most practical choice. They are reliable, affordable, and well-documented. As you gain experience, you can experiment with copepods or enriched brine shrimp to improve survival rates.
Common Mistakes in Clownfish Fry Rearing
Even experienced breeders make mistakes. Here are the most common ones and how to avoid them.
- Overfeeding rotifers: Excess rotifers die and decay, spiking ammonia. Monitor rotifer density daily and adjust feedings accordingly. If you see cloudy water or smell ammonia, you are overfeeding
- Wrong lighting: Fry need dim, indirect light to find food. Bright lights cause stress and reduce feeding. If your fry are not eating or appear to be swimming in circles, check your lighting setup
- Inadequate aeration: Too little flow and rotifers settle on the bottom. Too much flow and larvae get pushed around. Adjust your air stone or sponge filter outlet until you see a gentle rolling motion at the surface
- Not matching rotifer size: Large rotifers are harder for tiny larvae to eat. If your rotifer culture has many adults, consider feeding them smaller, newly hatched rotifers for the first few days
- Skipping water changes: Small, regular water changes are essential. Skipping them leads to waste buildup and poor water quality. Even a 10% water change every three days makes a noticeable difference
Each of these mistakes is fixable. The key is to observe your fry daily and adjust quickly. If something looks off, act immediately. Waiting rarely helps.
When to Move Fry to a Grow-Out Tank
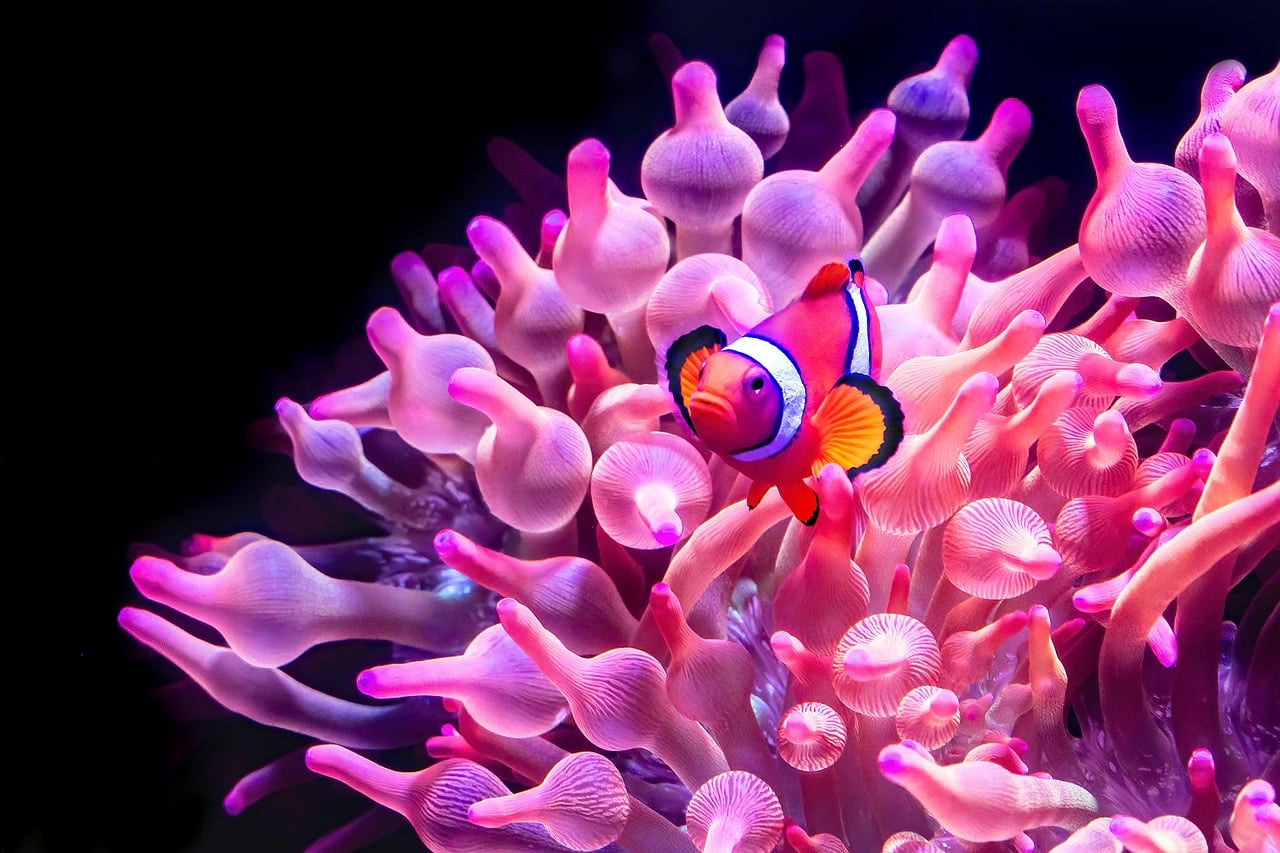
Around two to three weeks post-hatching, your fry will go through metamorphosis. They develop their color bands and take on a more recognizable clownfish appearance. This is when you can move them to a grow-out tank.
Look for these visual cues: the orange and white bands are clearly visible, the fish are swimming actively and feeding on prepared foods, and they are large enough to avoid being sucked into a standard filter intake.
The grow-out tank should be slightly larger, maybe 20 to 30 gallons. Use a gentle canister filter or a larger sponge filter. Flow can be increased now because the juveniles are stronger. Keep water parameters similar to the rearing tank.
Transfer fish carefully using a net or a cup. Do not pour the entire rearing tank into the grow-out tank. If the parameters differ, acclimate them to the new water slowly.
After transfer, continue feeding prepared foods and increase the frequency of water changes as the fish grow. Juveniles grow fast at this stage if fed properly.
Raising Clownfish on a Budget vs. Full Pro Setup
You can raise clownfish with minimal equipment, or you can invest in a professional setup. Which approach you choose depends on your goals.
Budget approach: A 10-gallon tank, a cheap sponge filter, a basic heater, and a DIY rotifer culture work fine for raising a few fry. Cheaper equipment is less forgiving, so you will need to be more diligent with water changes and feeding. Total cost: under $150 for the setup plus ongoing food costs.
Pro approach: A 20-gallon rearing tank with an automated light timer, a commercial rotifer culture system, and a high-quality heater with an external controller. This setup reduces daily maintenance and improves consistency. Total cost: $300 to $500 or more.
For most home breeders, the budget approach is fine for the first few batches. As you gain experience and want to scale up, you can invest in better gear. The key is to buy the right pieces for your situation, not the most expensive ones.
A $50 sponge filter is not necessary. A $20 one works if it fits your tank. Spend your money on a good test kit and a reliable heater. Those two items directly affect survival rates.
Mortality Is Normal â When to Start Over
Here is the honest truth: you will probably lose most of your first few batches. Fifty to ninety percent mortality is common. It is not a reflection of your skill. It is part of learning the subtle details of raising clownfish.
Signs that a batch is failing include: fry not feeding within 24 hours of hatching, fungus on the eggs or larvae, widespread deformities like bent spines, or sudden die-offs overnight.
When this happens, clean the tank thoroughly, replace the water, and wait for the next egg batch. Do not get discouraged. Every failed batch teaches you something. Adjust your process and try again.
Successful breeders are persistent, not perfect. They fail multiple times before figuring out what works for their specific setup. If you can handle that, you will eventually raise healthy juveniles.

Final Checklist for Raising Healthy Juvenile Clownfish
- Set up a dedicated rearing tank with sponge filter, heater, and dim lighting
- Maintain stable water parameters: 80-82°F, salinity 1.024-1.026, ammonia/nitrite 0
- Collect eggs on day 5-6 and transfer to rearing tank with gentle aeration
- On hatching night, dim lights and have rotifers ready at 5-10/mL
- Feed rotifers for first 10 days, add baby brine shrimp at day 10, wean to prepared food by day 21
- Test water daily for the first two weeks and perform small water changes regularly
- Move fry to grow-out tank after metamorphosis (2-3 weeks)
- Expect mortality and learn from each batch
If you are starting from scratch, consider a starter kit that includes a sponge filter, heater, test kit, and rotifer culture. That combination gives you the essentials without overcomplicating things.
Frequently Asked Questions About Raising Baby Clownfish
How long until clownfish are sellable? Juveniles reach a sellable size of about an inch around three to four months after hatching. Color and pattern development continues for several more months.
Can you raise multiple clownfish species together? Not in the same rearing tank. Different species grow at different rates and may hybridize. Keep each species in its own tank.
Do baby clownfish need special lighting? Yes. Dim, indirect light is critical for the first week. After metamorphosis, they can handle standard aquarium lighting.
What if parents eat the eggs? This is common with inexperienced pairs. Remove the eggs after day 5-6 to prevent predation. Ensure the parents are well-fed. Some pairs also need time to learn parenting behavior.
How many batches can you raise per year? With a stable pair laying every two to three weeks, you can raise 15-20 batches per year. Success rate depends on your setup and experience.
Do I need a rotifer culture or can I buy them? You need a culture. Buying rotifers weekly is expensive and unreliable. A culture takes 30 minutes of maintenance per week and pays for itself quickly.
What is the hardest part of raising clownfish? The first ten days. Water stability, feeding schedule, and lighting are all critical. If you get through that, the rest is much easier.