How to Photograph Clownfish Underwater: A Practical Guide to Getting the Shot
Why Clownfish Are a Great Subject for Underwater Photography
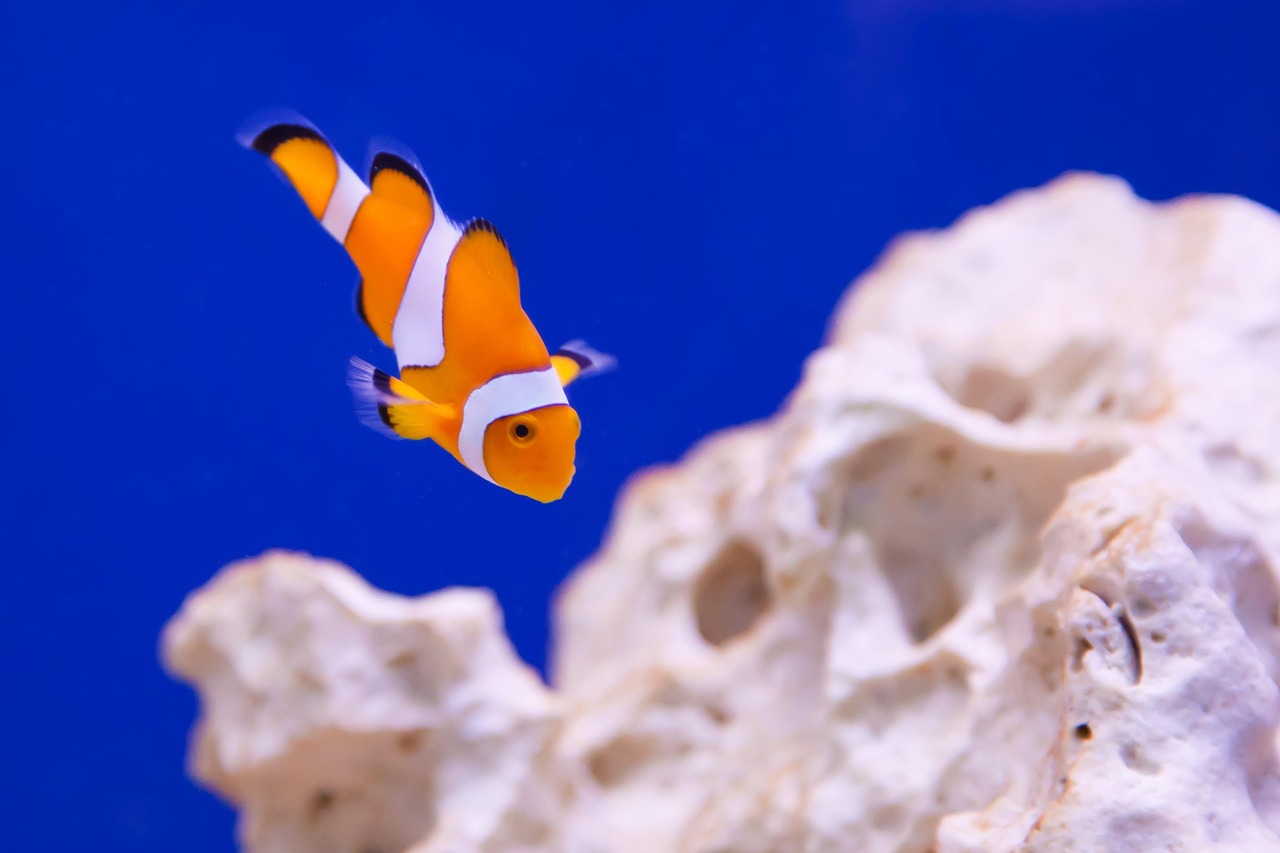
If you’re getting into underwater photography, clownfish are one of the easier subjects to start with. They’re not particularly shy, they don’t bolt the second you get close, and they tend to stick around the same anemone for months or even years. That gives you a lot more room for error compared to open-water fish that vanish before you can even get your camera up.
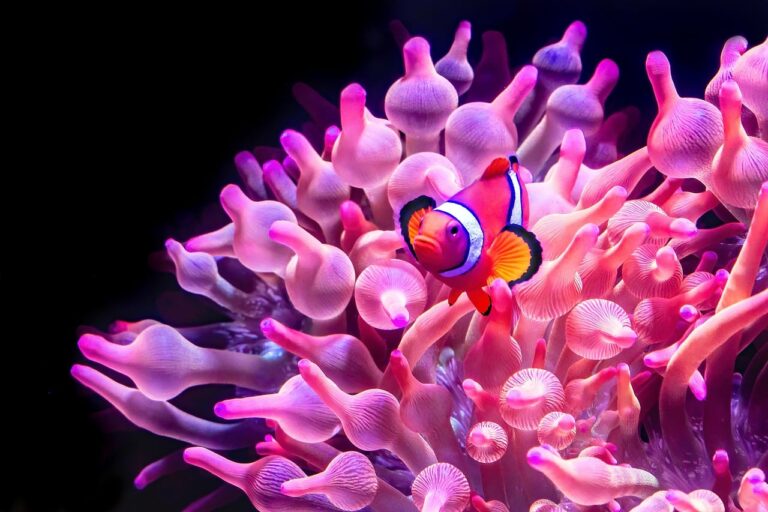
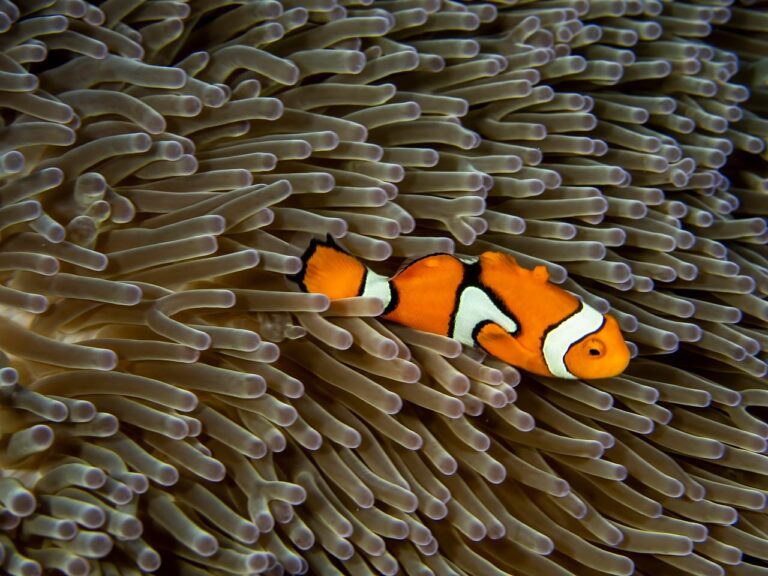
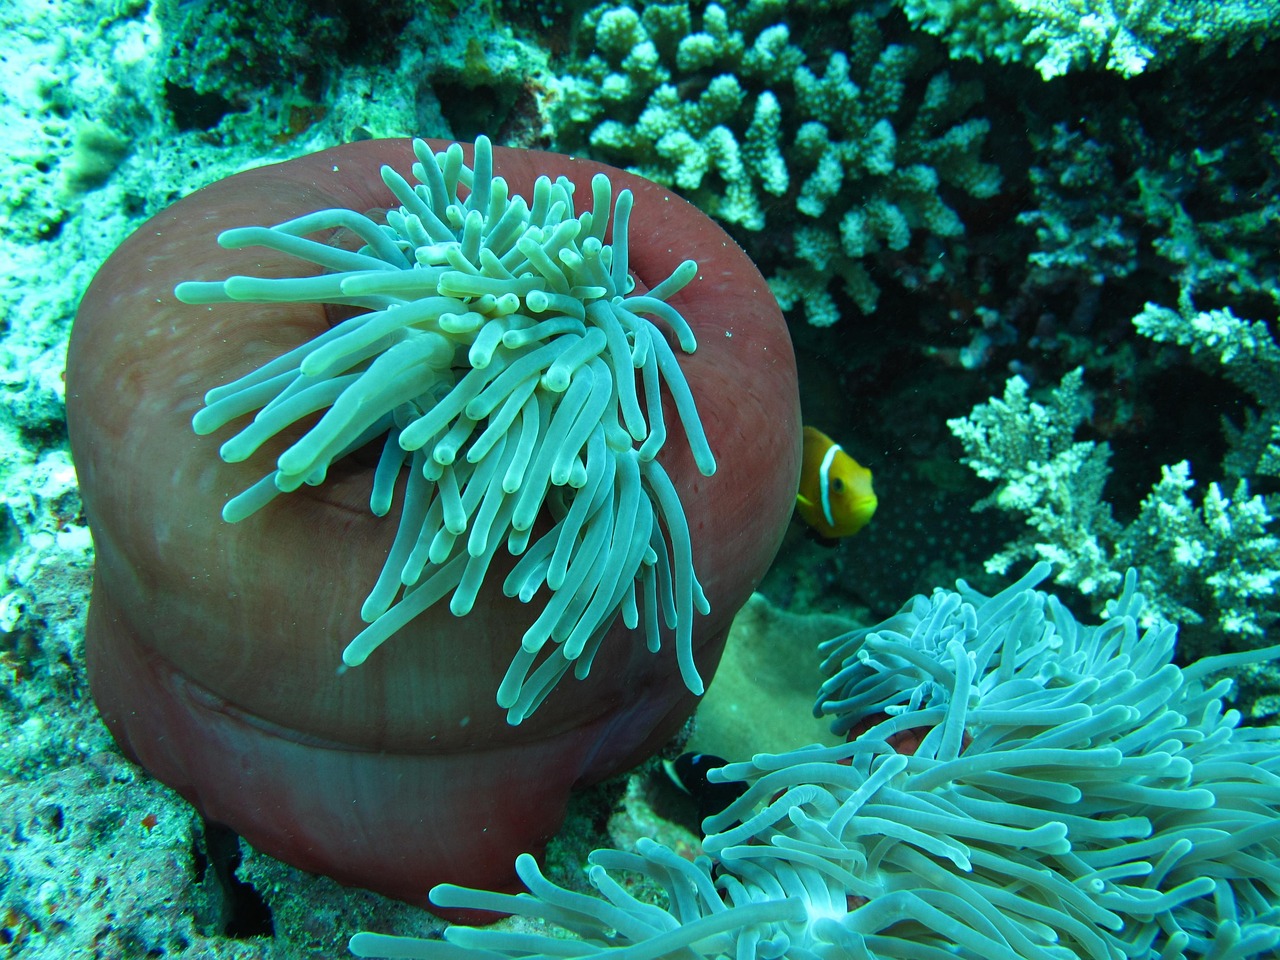
Most clownfish you’ll see are the common orange-and-white Ocellaris or Percula varieties, but you’ll also run into tomato, maroon, and skunk clownfish depending on the dive site. They hang out around their host anemone, darting in and out of the tentacles, which gives you time to adjust your settings and compose. The contrast between those bright orange bodies and the often purple or green anemone looks good even without a lot of post-processing.
Another thing that makes them a solid subject: their behavior is predictable. A clownfish guarding eggs will stay near the nest. One feeding over the anemone will hit the same spots over and over. Once you learn to read those patterns, you can set up for the shot instead of just chasing the fish around. That helps a lot when you’re still figuring out aperture, shutter speed, and flash positioning.
For anyone looking to practice photograph clownfish underwater tips, these fish are basically the studio models of the reef. They sit still, they’re colorful, and they’ll let you make mistakes without swimming off every time.

The Gear You Actually Need to Photograph Clownfish Underwater
You don’t need a $5,000 housing and a full-frame DSLR to get good clownfish photos. Gear matters, but technique matters more. Here’s what realistically works at different budget levels.
Entry Level: A Compact Camera With Macro Mode
Something like the OM System TG-6 or the older TG-5 works well for starting out. These have decent macro modes, built-in focus stacking, and they’re rugged enough for shallow reef environments. They’re also small enough to fit in a BC pocket. A basic underwater housing is usually included or available for under $200.
The downside: small sensors mean more noise in low light. You’ll want to shoot in clear, well-lit water or use an external light.
Mid-Range: Mirrorless With a Macro Lens
For around $1,500 to $2,500, you can get a used Sony A6000 series camera, a Nauticam or Seafrog housing, and a 60mm or 90mm macro lens. This gives you better control over depth of field and noticeably sharper images. The larger sensor handles low light better, which matters when you’re shooting at 1/125 or faster.
Pro Level: DSLR or Full-Frame Mirrorless
If you’re already shooting weddings or wildlife topside and want to bring that underwater, you’ll need a proper housing and strobes. A Canon R5 or Sony A7R IV in an aluminum housing with dual strobes will run you $6,000+ before you even look at lenses. For clownfish specifically, a 100mm macro lens is the gold standard.
Accessories That Actually Help
- A focus light. Cheap and essential. A simple Sola or Light & Motion 500-lumen light helps the camera lock focus faster in darker water.
- A single strobe. Even one entry-level strobe like the Sea & Sea YS-01 makes a big difference over natural light.
- A tray and handle. Keeps your rig stable and your shooting hand free.
- A Gates clamp or grip mount. Stops your strobe from rotating out of position mid-dive.
If you want to browse gear without doing hours of research, check out popular compact housings and macro lenses on Amazon to get a feel for what fits your budget.
Best Camera Settings for Sharp Clownfish Photos
Settings aren’t one-size-fits-all, but if you’re just starting out, this baseline works for most reef conditions:
| Setting | Recommendation | Why |
|---|---|---|
| Aperture | f/8 to f/11 | Gives enough depth of field to keep the whole fish sharp while blurring background anemone tentacles. |
| Shutter Speed | 1/125 sec or faster | Stops fish movement and camera shake. Use 1/160 if you can. |
| ISO | 200â800 | Start at 200. Only raise ISO if you can’t get a fast enough shutter. Keep below 800 if possible. |
| Focus Mode | Single-point AF | Place the focus point on the fish’s eye. Wide-area AF will grab the anemone instead. |
| White Balance | Custom or manual | Set to around 5200K for the first shot, then adjust based on depth. Or shoot raw and fix it later. |
In bright, shallow water (less than 10 feet): Set aperture to f/8 and shutter to 1/200. Keep ISO at 200. Natural light is still strong, so you might not need strobes for exposure, but they still help punch color back into the image.
In dimmer conditions (20 feet or deeper): Move to f/8 or f/9, shutter to 1/100, and raise ISO to 400â800 if needed. This is where a strobe or video light becomes critical for maintaining color and sharpness.
Personal tip: Set your camera to aperture priority (AV mode) so you can focus on composition while it handles the shutter. Just watch your shutter speed and bump ISO if it drops below 1/100.
Lighting: Natural Light vs. Strobes vs. Video Lights
Lighting is the single biggest factor that separates average clownfish photos from great ones. Here’s the breakdown.
Natural Light
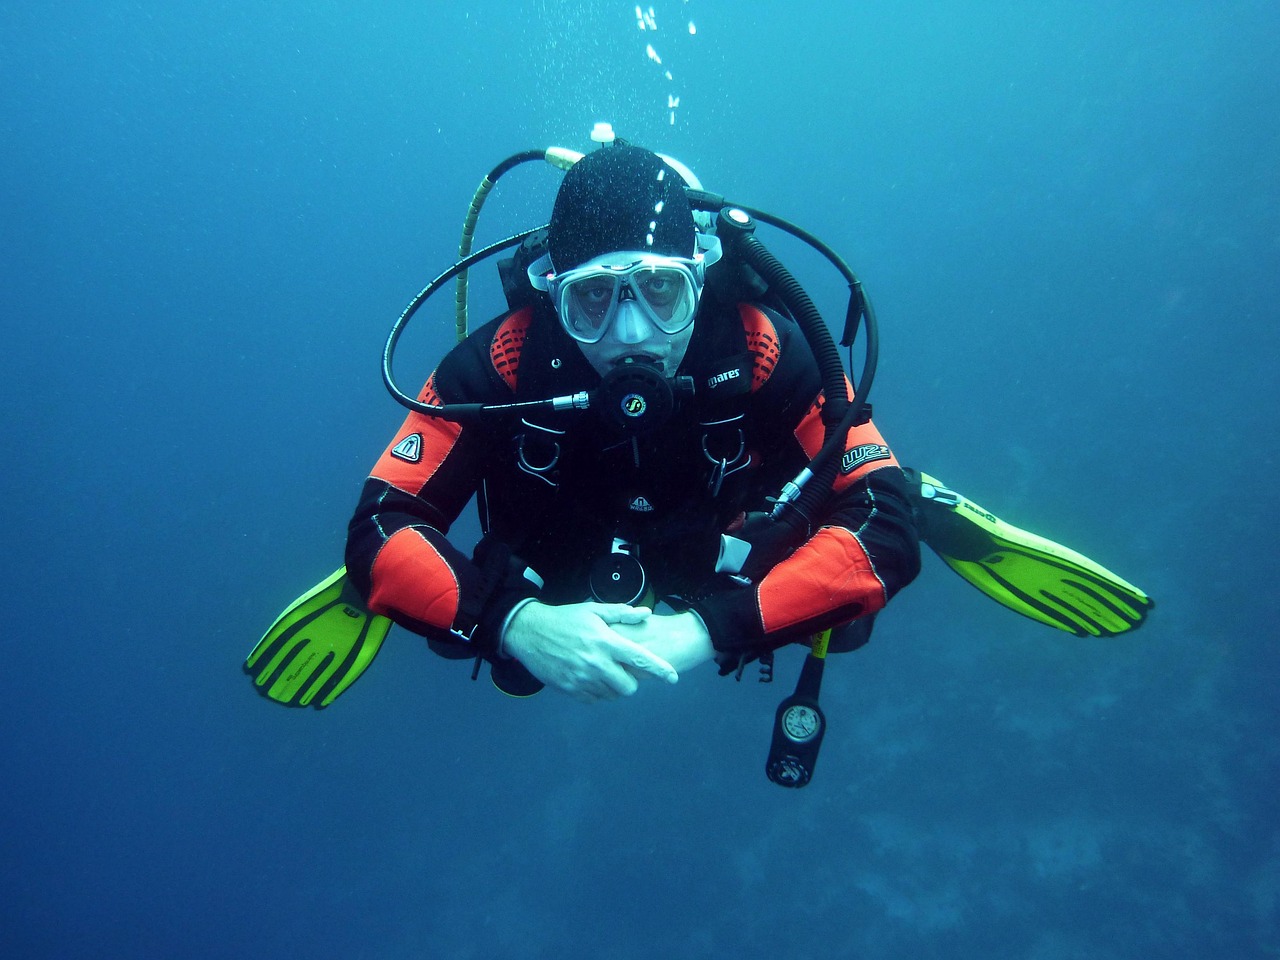
Works best above 15 feet in clear water. The downside is that water absorbs warm colors, so your clownfish’s orange can turn into a washed-out brick color. You also get harsh shadows from the sun above. If you’re shooting natural light, shoot early in the day when the sun is higher, use a polarizing filter if possible, and try to find an angle where the fish is backlit or side-lit. Overcast days can actually work better because they diffuse shadows.
Strobes
Strobes are the pro choice for a reason. They freeze motion, punch color back into your subject, and let you shoot at greater depths. Even a single strobe aimed from the side will bring out the neon blues and oranges that make clownfish photos pop. The trick is positioning: aim slightly above and to the side of the fish to mimic natural top-down light. Avoid aiming straight on unless you want flat, washed-out shots.
Recommended strobe for beginners: the Sea & Sea YS-01 or the Inon Z-330. Both are reliable and affordable. You can find them on Amazon easily.
Video Lights
Video lights work well for shooting in shallow water when you already have a compact camera with a small sensor. They’re constant, so you can see exactly what you’re getting. The problem is they often create motion blur at slower shutter speeds, and they drain batteries fast. I’d only recommend them as a supplement to a strobe, not as a primary source. If you’re snorkeling in very shallow water, a small video light like the Light & Motion Sola 500 is fine.
Situational advice: For a typical clownfish dive at 15-30 feet, start with natural light first and see if you get sharp images. If they’re blurry or muted, switch to a single strobe. Two strobes are overkill for most clownfish because they’re close subjects and you’ll end up with too much light reflection off the anemone.

Composing the Shot: Angles, Backgrounds, and the Rule of Thirds
Good composition underwater isn’t that different from topside photography, but there are a few tricks specific to clownfish.
Get on Their Level
Don’t shoot down at the anemone from above. That angle gives you a flat-looking fish and a distracting sand background. Instead, descend to the same height as the fish or slightly below it. This puts the anemone behind them, creating a soft, colorful backdrop that makes the fish stand out.
Watch the Background
The worst backgrounds are busy reef behind the fish, or a bright water column that blows out the exposure. Try to position yourself so the background is either solid blue water or dark reef. If the fish is looking into the frame, leave some negative space in front of its face. That’s the rule of thirds in action.
Use the Anemone as a Frame
Anemone tentacles naturally create leading lines. Shoot through a few tentacles in the foreground to frame the fish. This adds depth and gives the image a trapped-in-the-reef feel. Just make sure those tentacles aren’t in focusâthey should be soft and out of focus or slightly blurred.
Avoid This Common Mistake
Don’t cut off the fish’s tail or clip the edges of the anemone. Leave a small breathing room around your subject. A tight crop in-camera is fine, but leaving a little extra space lets you crop later if needed. It’s easier to crop than to add space that’s not there.
Understanding Clownfish Behavior to Get Better Photos
Clownfish aren’t random wanderers. They have daily routines that directly affect when and where you’ll get the best shots.
Early morning (6-8 AM): They’re most active, feeding on plankton and checking the edges of their territory. This is the best time for action shots. They’ll dart out, feed, and return to the same spot repeatedly. Get ready with a fast shutter speed.
Late morning to early afternoon: They slow down and hover closer to the anemone. This is when you can get sharp, stationary portraits. Use a shallow depth of field and focus on the eye. The light is also better at this time.
Afternoon: They often rest near the base of the anemone or in the shade. Photos here will be darker and less dramatic. If you see them hiding behind the anemone, they’re stressed or being territorial. Back off and let them settle.
Guarding eggs: This is the holy grail for photographers. If you find a pair fanning eggs on a flat rock near the anemone, you’ll have an hour of non-stop action as they clean and aerate them. The downside is they get aggressive. Expect the larger fish to charge at your camera. Stay at least three feet back and use a longer lens if you can. Don’t poke at the nest.
Key tip: Move slowly. Clownfish are curious but skittish. If you approach too fast, they’ll dive into the anemone and refuse to come out for five minutes. Wait until they re-emerge before composing. Patience pays off way more than speed.
Common Mistakes When Photographing Clownfish and How to Avoid Them
Every beginner makes these. Here’s the fix for each.
- Getting too close. You’ll scare the fish and risk touching the anemone. Stay at least 1-2 feet away. Use a zoom or extendable arm if needed.
- Wrong focus point. The camera’s autofocus will grab the anemone tentacles because they’re closer and higher contrast. Always use single-point AF and place it on the fish’s eye.
- Overexposing the anemone. That bright purple anemone can blow out highlights fast. Use exposure compensation -1/3 stop or adjust your strobe power down by a third. Better to have a slightly dark anemone than a blown-out one.
- Flat flash. If your strobe is positioned directly in front of the fish, colors look washed out. Move it to the side or slightly above to create directional light.
- Shooting from above. Destroys the composition and gives you a boring background. Get level with the fish or shoot from a slight upward angle.
- Using flash too close to the anemone. Disorients the fish and can make them retreat. Turn down your strobe power to minimum if you’re within three feet.
A Step-by-Step Approach for Your Next Dive
Follow this workflow and you’ll get consistent results without disturbing the reef.
- Pre-dive gear check. Make sure your camera housing seals are clean, batteries are charged, and your strobe arm is tight. Check that your focus light works.
- Find the anemone. Look for patches of sand with one large anemone. Clownfish are almost always in it. Approach from the side, not directly above.
- Set your camera. Go to AV or manual mode. Dial in f/8, 1/125, ISO 200. Set focus to single-point AF. If using a strobe, turn it on to half power and position it above and to the side.
- Wait and watch. Don’t start shooting immediately. Let the fish adjust to your presence. Give it 30 seconds. If it charges at you, back off a bit.
- Compose and shoot. Aim the focus point at the eye. Shoot 3-5 frames from different angles. Try shooting through a tentacle for depth. If the fish is looking at you, try a few shots with it looking into the frame.
- Move on. After 5-10 minutes, back away. Give the fish a break and avoid stressing it. There’s no need to linger. A short session yields better results than a long, annoying one.
Editing Your Clownfish Photos: What Actually Matters
Post-processing is where you fix what the water did to your colors. Here’s a simple workflow.
- White balance. If you shot in raw, adjust the white balance to remove the blue cast. Use the dropper tool on a neutral gray area, or set it manually around 5200-5600K. If you shot jpg, use a preset or adjust manually.
- Exposure. Increase exposure slightly to brighten the fish. Clownfish photos tend to come out underexposed, so +0.3 to +0.7 is common. Pull highlights down if the anemone is blown out.
- Contrast and clarity. Add +10-20 contrast and +5-10 clarity. This sharpens the fish’s texture without making the image look crunchy.
- Saturation. Be careful here. A tiny boost (+5-10) to the orange channel is usually enough. Over-saturating makes the fish look fake. Real clownfish already have plenty of color.
- Crop. Crop in slightly to tighten the frame. Straighten any tilted horizon. If the fish is looking left, crop with more space on the left side.
Software recommendation: Adobe Lightroom Classic is the standard for a reason. It’s $10/month and handles everything above. For a one-time purchase, Luminar Neo works too. You can also find photo editing software that fits your budget. You don’t need anything more expensive for clownfish photography.
Best Locations for Photographing Clownfish Underwater
Clownfish are found across the Indo-Pacific and parts of the Caribbean (where they were introduced). Here are the top spots ranked by reliability and accessibility.
- Raja Ampat, Indonesia. Best overall. Hundreds of anemones, clear water, and excellent visibility year-round. Best season: October to April. Expect to pay $150-300 per day for liveaboard or resort diving.
- Great Barrier Reef, Australia. Easy for beginners. High density of clownfish around Lizard Island and the Ribbon Reefs. Best season: June to October. Prices are higher here, starting at $200 per day.
- Coral Triangle (Philippines, Papua New Guinea, Solomon Islands). Huge biodiversity. Many endemic clownfish species. Best season: varies by location, but generally November to May. Liveaboards run $200-400 per day.
- Maldives. Good for resort-based diving. Anemones are abundant on house reefs. Best season: December to April. Prices moderate, around $100-150 per day for boat dives.
- Hawaii. You’ll find Tomato and Maroon clownfish here. Visibility is decent but water is colder (low 70s). Best season: year-round, but winter brings bigger swells. Day boat dives cost about $150.
If you want a liveaboard experience, search for operators in those regions. Many offer photo-focused trips with nitrox and camera rinsing stations. Expect to book months in advance for peak season.

Frequently Asked Questions About Photographing Clownfish Underwater
Do clownfish attack divers?
Aggression is rare but happens when they’re guarding eggs. The larger female may charge at your camera lens. It’s more startling than dangerous. Just back off a foot and she’ll stop.
What focal length is best for clownfish?
For compact cameras, use the macro mode. For mirrorless/DSLR, a 60mm to 100mm macro lens. If you only have a wide-angle zoom, get as close as possible and crop later.
How do you avoid hurting the anemone?
Don’t touch it. Anemones are delicate. Never rest your hand, camera, or fin on the tentacles. Keep at least a foot away. If the anemone retracts, back off immediately.
Do you need a macro lens?
Not strictly. You can get great shots with a wide-angle lens by getting close and shooting upward for a dramatic perspective. But macro gives you the sharpest facial details and better background blur.
Can snorkelers get good shots?
Absolutely. Snorkeling from a calm reef flat or from a boat over shallow water is where many beginners get their first clownfish photos. The light is better, the water is warmer, and the fish are often more relaxed. Just use a simple compact camera like the TG-6 and stay still.
Final Thoughts: Getting Started with Clownfish Photography
Clownfish are the perfect subject to sharpen your underwater photography skills. They’re cooperative, colorful, and everywhere in the tropics. You don’t need to invest thousands upfrontâa simple compact camera, a focus light, and a willingness to wait for the fish to settle will get you results on your first day.
If you’re serious about improving, the single best upgrade is a strobe. It will transform your images by restoring color and freezing motion. After that, practice shooting at the fish’s eye level and paying attention to the background.
Above all, respect the reef. No photo is worth damaging an anemone or stressing a clownfish beyond its tolerance. Keep your movements slow, your shutter steady, and your curiosity alive. The right shot will come.