Introduction
If youâve spent any time around coral reefs as a diver or snorkeler, youâve probably noticed that not all reefs look the same. Some are bursting with fish and colorful coral. Others feel quieter, with more bare rock and fewer big predators. Thatâs where the reef check survey methodology comes in. Itâs a standardized way to measure reef health that anyone can learn â whether youâre a marine biology student, a conservation volunteer, or just a diver who wants their underwater observations to actually mean something.
The idea is simple: instead of guessing whether a reef is doing well, you follow a repeatable process that lets you compare data across different sites and over time. Reef Check started this approach decades ago, and itâs now used by thousands of citizen scientists worldwide. This guide walks through exactly how to do it.

What Is the Reef Check Survey Methodology?
The Reef Check survey methodology is a structured scientific protocol developed by the Reef Check Foundation. It was designed so that trained volunteers â not just professional marine biologists â could collect reliable data on coral reef health. The core idea is standardization. Every survey follows the same rules: where you put the transect line, which species you count, how you record coral cover, and how you handle visibility or depth issues.
This matters because reefs vary naturally. A healthy-looking reef in one region might look completely different from a healthy reef somewhere else. Without a consistent method, you canât tell whether differences are real or just caused by how someone collected the data. The Reef Check method solves that by giving everyone the same checklist. Key components include fixed-length transect lines (usually 100 meters), a defined list of indicator species (both fish and invertebrates), and a point-intercept system for measuring coral cover. You repeat the same procedure each time, and thatâs what makes the data useful for scientists and managers.
Equipment You Need to Conduct a Reef Survey
You donât need a lab full of gear to run a reef check survey, but having the right stuff helps. Hereâs what matters:
- Transect tape or line â A 100-meter fiberglass tape is standard. It needs to be durable, easy to read underwater, and resistant to tangling. Some people use nylon lines with marked intervals, but tapes are easier for the point-intercept method. A good one like the Komelon fiberglass tape works well.
- Underwater slate and pencil â Youâll be writing on a plastic or plexiglass slate with a regular pencil (or a grease pencil if you prefer). The Trident dry erase slate is popular because you can reuse it, but any hard surface that holds pencil marks works. Avoid paper unless itâs in a waterproof notebook.
- Dive computer â Essential for tracking depth and bottom time. You need to stay within the survey depth range (typically 3 to 12 meters) and manage your no-deco limits. A reliable model like the Suunto D5 or Cressi Leonardo covers the basics well.
- Underwater camera â Not strictly required, but very helpful for photographing species you arenât sure about or documenting unusual sightings. A GoPro or any compact housing for a phone works fine.
- Dive light â Useful for looking under ledges and in crevices where fish and invertebrates hide. Even in clear water, shadows can hide important indicator species. A simple UK Light Cannon or similar LED torch is sufficient.
- Good dive kit â Fins, mask, and BCD that fit well. Youâll be swimming slowly along a transect for a while, so comfort matters. A streamlined setup reduces fatigue and helps you stay focused.
You donât need to spend a fortune. The key is reliability. Gear that fails or is hard to use underwater will mess up your data. Test everything in a pool or shallow water first.
Step 1: Selecting Your Survey Site
Site selection is probably the most underappreciated part of the process. A bad site choice can make your data useless, no matter how carefully you follow the rest of the method.
Start with depth. The standard Reef Check survey is done between 3 and 12 meters. Thatâs shallow enough for good light and long bottom time, but deep enough to represent the reefâs main structure. Avoid very shallow rubble zones or drop-offs that are hard to survey safely.
Visibility matters too. You need at least 5 meters of horizontal visibility to count fish and identify corals accurately. If the water is murky, consider picking a different day or a site with better conditions. Also, think about accessibility. Can you get in and out easily? Is there a safe entry point? If youâre on a boat, can you anchor without damaging the reef?
Choose a representative area. If the reef has distinct zones â say a sandy patch near the shore and a coral-covered slope further out â pick one zone and stick with it for all your surveys. Consistency is more important than variety. And if youâre new to this, pick a site thatâs relatively flat and not too exposed to currents.

Step 2: Setting Up the Transect Line
This is where the science happens. The standard Reef Check transect is 100 meters long. You run it parallel to the reef crest or along a depth contour. The goal is to get a representative sample of the reef, not to cherry-pick the prettiest part.
Attach one end of the tape securely to a fixed point â a rock, a dead coral head, a weight â then lay the tape out as straight as possible. Keep it at a consistent depth. If the reef slopes, follow the contour. Avoid running the tape across large sand patches or over deep drop-offs where fish behavior changes.
Common mistakes include using a transect thatâs too short (some people try to save time with 50 meters, but that reduces statistical power) or not tensioning the tape enough so it curves. If the tape isnât straight, your distance measurements will be off, and that messes up fish counts and coral cover estimates. Watch out for snags too. Coral heads and crevices can catch the tape. Gently lift it over obstacles rather than yanking it, which can damage the reef.
Once the tape is laid, note the start and end depths. If the depth changes by more than a meter or two along the transect, you may need to adjust your survey design or pick a flatter area next time.
Step 3: Identifying Indicator Species
This is where you earn your stripes. The Reef Check methodology focuses on a specific set of indicator species that are sensitive to human impacts like fishing pressure, pollution, and bleaching. You donât count everything â you count what matters.
Here are the main indicator groups you need to know:
- Groupers and snappers â Large predatory fish that are heavily targeted by fishing. If you see many big groupers, itâs usually a good sign. If you see none, thatâs a red flag.
- Parrotfish â Key herbivores that control algae growth on reefs. Their presence indicates healthy grazing pressure. Learn to distinguish between juvenile and adult parrotfish by size and coloration.
- Butterflyfish â Sensitive to coral health because many feed directly on coral polyps. A diverse butterflyfish population often correlates with good coral cover.
- Sea urchins â Particularly long-spined urchins (Diadema) and collector urchins (Tripneustes). High densities of Diadema can indicate overfishing of their predators. Low densities might mean water quality issues or past disease outbreaks.
- Sea cucumbers â Especially species like Thelenota ananas (prickly redfish) and Holothuria scabra (sandfish). These are heavily harvested in some areas. Abundance indicates relatively low collection pressure.
- Coral types â You classify corals into general shapes: massive, branching, encrusting, foliose, and table. Also note the presence of bleached or dead corals.
Donât try to memorize everything on your first survey. Use an ID card or a waterproof guide. Many organizations provide laminated identification sheets for the local area. Practice identifying common species on recreational dives before your survey day. The more familiar you are, the faster and more accurate your counts will be.
Step 4: Collecting the Data Underwater
Youâve got your transect set up and you know what to look for. Now itâs time to swim and count.
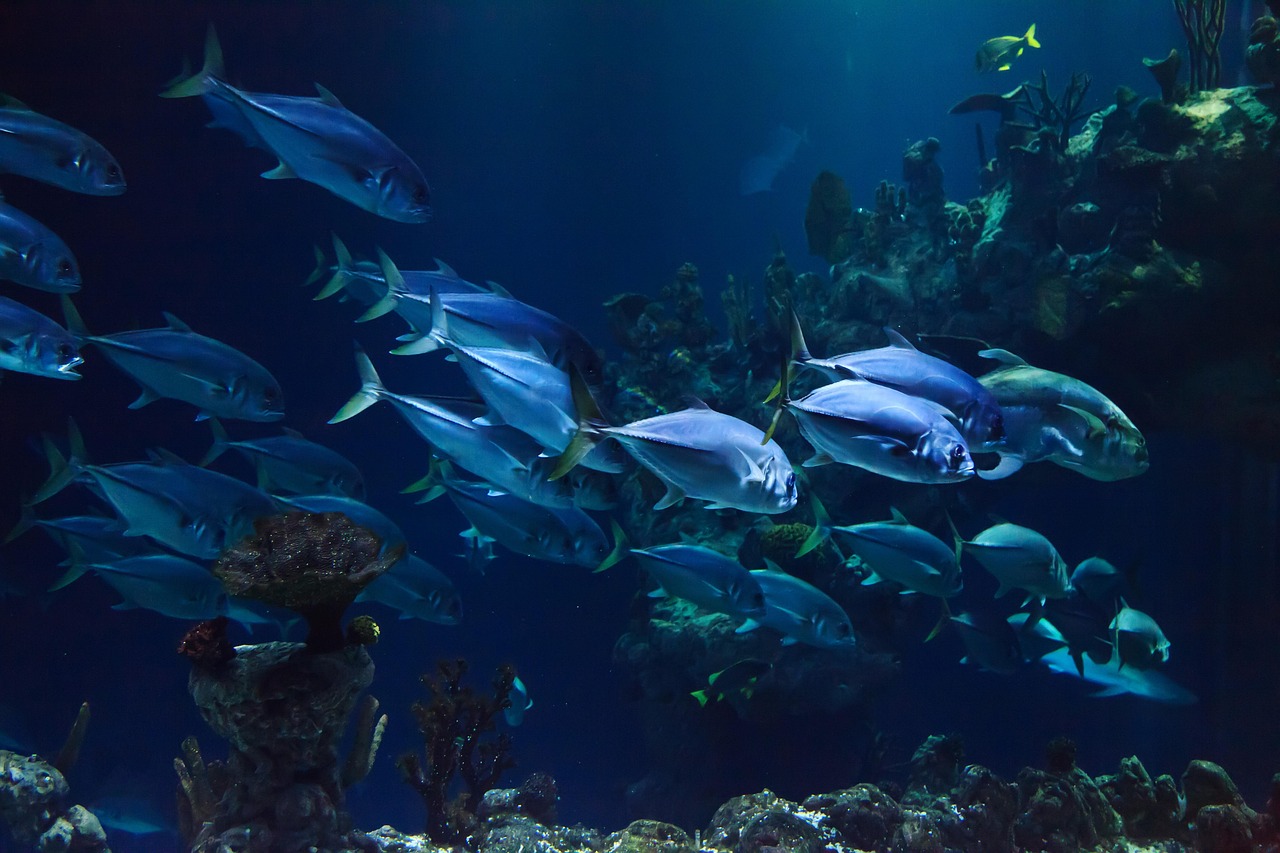
For fish, you use a belt transect. Swim slowly along the tape, counting all target species within 5 meters on either side of the line. That gives a total survey area of 5 meters wide by 100 meters long. Swim at a steady pace â too fast and youâll miss fish, too slow and youâll run low on air. Aim for about 15 to 20 minutes for the fish count. Pause occasionally to check crevices or look up at schooling fish.
For invertebrates, you do the same swim but focus on the bottom. Check under ledges, inside holes, and on open sand patches. Some species, like sea cucumbers, are easy to see. Others, like urchins, can be hidden. Use your light to look closely.
For coral cover, you use the point-intercept method. At every 0.5 meter mark on the transect tape (thatâs 200 points total), record what lies directly beneath the tape: coral (and which type), sand, rubble, rock, algae, or sponge. This method gives a statistically robust estimate of benthic cover. Itâs tedious but very reliable.
Work with a buddy if possible. One person can call out species counts while the other records. Switch roles halfway through to reduce fatigue. And if you get distracted â a passing shark, a strong current â pause the survey and restart from a known point. Donât rush to catch up.
Common Mistakes and How to Avoid Them
Even experienced surveyors make errors. Here are the most common ones and how to fix them:
- Miscounting small fish â Juveniles are easy to miss. Train yourself to scan the whole water column, not just the bottom. Use a consistent search pattern.
- Irregular swimming speed â If you speed up and slow down, your effective search area changes. Maintain a steady pace. Use a timer if it helps.
- Recording data illegibly â Pencil smudges underwater. Write clearly and double-check numbers immediately after surfacing. Rewrite notes on a dry slate as soon as youâre on the boat or shore.
- Skipping indicator species â If you arenât sure about a fish, donât ignore it. Take a photo, note its approximate size and color, and identify it later. Skipping creates gaps in your data.
- Not correcting for depth changes â If your transect goes from 5 meters to 8 meters, fish communities will differ. Record depth at both ends and account for it in your analysis. Better yet, choose a flat site.
- Transect not straight â A curved line means your distance measurements are wrong. Anchor both ends if possible and check alignment.
Reef Check vs. Other Survey Methods
Reef Check isnât the only game in town. You might also come across REEFâs Fish Survey Project, AIMS (Australian Institute of Marine Science) monitoring protocols, or academic methods like digital photogrammetry and video transects.
Hereâs the tradeoff:
- REEF surveys are simpler â just fish ID and abundance estimates. Theyâre good for building species lists and tracking rare sightings, but less quantitative for measuring reef health trends.
- AIMS protocols are more rigorous. They involve fixed marker pins, high-detail substrate mapping, and often require a boat and multiple divers. The data is high quality, but the effort and cost are much higher. Not practical for most volunteers.
- Digital methods (video or photo transects) offer permanent records and high accuracy, but they require expensive equipment and software training. You canât adapt to fish behavior in real time.
Reef Check sits in the sweet spot: rigorous enough for meaningful data, simple enough for trained volunteers. If you want to contribute to global datasets without becoming a full-time researcher, this is the method to learn.

Best Tools to Help You Get Started
You can do a reef check survey with minimal gear, but a few tools make the work much more efficient and reduce errors.
- Underwater slate with a lanyard â You donât want to drop this at 10 meters. The AquaSketch dry erase slate is well-reviewed. The dry erase surface lets you wipe and reuse, and the lanyard tucks into your BCD pocket.
- Pre-printed data sheets â Laminated sheets with species names and columns are faster than blank slates. Many organizations sell them. Or print your own on waterproof paper using a laser printer.
- Transect reel â A simple spool to deploy and retrieve the tape. It prevents tangles and keeps the line organized. Look for a reel with a locking mechanism.
- Dive computer with depth alarm â If your transect runs along a slope, you might drift deeper than planned. A depth alarm reminds you to stay within the survey range. Many Suunto and Cressi models have this feature.
- Waterproof headlamp â Hands-free lighting for checking under ledges or in murky water. A Princeton Tec headlamp works well and clips onto your mask strap.
Best for beginners: start with a basic slate and a good dive computer. Add the other tools as you get more serious. Donât buy everything at once â just what you need for your first few surveys.
When to Conduct Reef Surveys
Timing matters more than most people realize. You want consistent conditions for every survey to minimize variables that arenât related to reef health.
Time of day is probably the biggest factor. Fish are most active around dawn and dusk, but visibility is often better mid-morning to early afternoon when the sun is high. Aim for between 10 AM and 2 PM. That gives you good light and avoids the strongest currents that often pick up later in the day.
Seasonal variation is real. In the tropics, the dry season usually offers the best visibility and calmest seas. In temperate regions, summer is optimal because water temperature is warmer and fish behavior is more predictable. Avoid storm seasons or months with high runoff if you can.
For long-term monitoring, survey the same site at the same time each year. If you survey in July one year and December the next, you canât tell whether changes are seasonal or long-term. Consistency is the whole point of the methodology.
Frequency depends on your goals. For general health tracking, once a year is enough. If youâre monitoring a specific threat (like a bleaching event or a new marine protected area), quarterly surveys are better.
How to Submit and Use Your Data
Collecting data is only half the job. The real value comes from sharing it.
Reef Check has a global database, and many national programs also accept data. The process is straightforward. After your dive, immediately review your slate. Check for illegible notes, missing species, or obvious errors. Transfer the data to a digital spreadsheet as soon as possible â within the same day if you can. Waiting leads to forgotten details.
Upload your data through the Reef Check website or the platform of your local program. Youâll typically need to include site location (GPS coordinates), survey date, depth range, and your full dataset. Most platforms will validate your entries and flag inconsistencies.
Your data goes into a global pool used by scientists, managers, and policymakers. It can show trends like coral loss, fish population declines, or recovery after marine protected area establishment. It might influence decisions about fishing regulations or conservation funding. Thatâs a lot of impact from one dive.
If you also use iNaturalist, you can upload species observations there too. Itâs not a substitute for the formal survey, but it adds to the biodiversity record.
Final Tips for Accurate Reef Surveys
Before you head out on your first survey, hereâs the condensed version of everything that matters:
- Practice species identification on normal dives before your survey day. The more IDs you can make instantly, the faster and more accurate your data will be.
- Always dive with a buddy for safety and data quality. Two sets of eyes are better than one.
- Review your slate immediately after surfacing, while the dive is still fresh. Fix any ambiguous notes right then.
- Consistency is everything. Following the same method every time is more important than being fast or covering more ground.
- If youâre serious about this, consider getting certified through a Reef Check training course. The classroom and in-water sessions teach you nuances you wonât pick up from reading a guide.
And if you catch the bug â and a lot of people do â consider joining a local Reef Check chapter or starting a group in your area. The more people collecting good data, the better we understand whatâs happening to reefs worldwide.