How to Cycle a Saltwater Aquarium: The Complete Guide
What Does Cycling a Saltwater Aquarium Mean?
Cycling is the process of establishing a biological filter in your tank. You’re growing a colony of beneficial bacteria that will handle the toxic waste your fish produce. That waste comes in three forms: ammonia, nitrite, and nitrate.
Ammonia comes from fish waste, uneaten food, and things breaking down in the water. It’s highly toxic to fish. Bacteria called Nitrosomonas convert ammonia into nitrite, which is still toxic. Then Nitrobacter and Nitrospira turn that nitrite into nitrate. Nitrate is much less toxic and is removed through water changes.
Cycling means growing enough of these bacteria to handle the bioload—the waste your future fish will produce—without ammonia or nitrite building up. Without this, your fish are swimming in poison from day one. It’s the most important step in keeping a saltwater aquarium.

Why You Must Cycle Before Adding Fish
Skipping the cycle is the fastest way to lose fish. I’ve seen new hobbyists rush into adding fish only to lose them within a week. Ammonia burns gills and causes red streaks on the body and fins. Fish start gasping at the surface. Nitrite affects oxygen uptake at the cellular level, essentially suffocating them from the inside.
The symptoms are pretty clear: lethargy, rapid breathing, clamped fins, then death. And it’s a chain reaction. The ammonia spikes, you might add more fish to try and fix it, and suddenly you’ve lost a lot of money in stock.
Cycling just isn’t optional. A bit of patience now saves a lot of heartbreak and money later.
Before You Start: What You’ll Need
Cycling requires some specific gear. Here’s what you’ll want to have on hand:
- Saltwater tank – Any size works, but larger tanks are more stable and easier to cycle. A 20-gallon long is a solid starting point.
- Heater and thermometer – Bacteria do best at 78-80°F. Inconsistent temps slow them down or kill the colony. A reliable aquarium heater with a thermostat is worth getting from the start.
- Protein skimmer – Not required, but handy. It helps remove organic waste before it breaks down into ammonia. You can run it during cycling to keep water cleaner.
- Test kits – Liquid kits for ammonia, nitrite, and nitrate. Strips are less accurate and can give you false confidence. A good master test kit is a worthwhile investment.
- Ammonia source – Bottled ammonium chloride (like Dr. Tim’s Ammonium Chloride) or pure, additive-free ammonia from the store. Clear, unscented, no surfactants.
- Rock and sand – Live rock or dry rock plus sand gives bacteria surface area to colonize. More surface area means a faster cycle.
- Bacteria starter – Bottled bacteria (Bio-Spira, MicroBacter7, Dr. Tim’s One and Only) can help kickstart things. They aren’t strictly necessary but can speed things up.
- RO/DI water – Tap water has chloramines and other stuff that can inhibit bacteria. Use reverse osmosis/deionized water for mixing your saltwater. It’s pretty important.
Each of these pieces matters. Don’t cheap out on test kits or try to shortcut water quality. Get the right tools from the start.
Choosing Your Cycling Method: Fishless vs. Fish-In
There are two ways to get a cycled tank. One is ethical and safe. The other is faster but can be rough on the fish.
Fishless cycling uses an ammonia source to feed bacteria directly. No fish suffer. You control the ammonia level, you can match it to your future bioload, and you track the cycle with test results. This is the method I’d recommend for any beginner.
Fish-in cycling uses a hardy fish like a damsel or chromis to produce waste. That fish lives in toxic water for weeks while the bacteria catch up. They usually survive, but it’s stressful and risky. Ammonia burns and nitrite poisoning are common, and some fish don’t make it.
The tradeoff is speed. Fish-in can finish a cycle in 3-4 weeks if you monitor constantly and do water changes. But the stress on the animal isn’t really worth the time saved. Modern bottled bacteria have made fishless cycling nearly as fast, without the ethical concern.
If you care about the animals—and I assume you do—go fishless every time.
Step-by-Step: How to Fishless Cycle a Saltwater Tank

Here’s the process I’ve used for years:
- Set up your tank. Place your tank on a level stand. Add sand, rock, then fill with pre-mixed saltwater at 1.023-1.025 specific gravity. Install the heater set to 78-80°F and add circulation with a powerhead or return pump.
- Add your ammonia source. Dose bottled ammonium chloride to reach 2-4 ppm of ammonia. Use a calculator or follow the product instructions. Don’t overshoot—too much can stall the cycle.
- Test every 2-3 days. Test for ammonia, nitrite, and nitrate. Write down the results. You’ll see an ammonia spike first, then nitrite, then nitrate.
- Wait for nitrite. Once nitrite shows up, keep ammonia at 2-4 ppm by re-dosing when it drops. The bacteria need a steady food source.
- Monitor until completion. The cycle is done when ammonia and nitrite both drop to 0 ppm within 24 hours of adding 2 ppm of ammonia. You should also see a nitrate reading. This usually takes 4-8 weeks.
- Avoid common pitfalls. Don’t overshoot ammonia. Keep temperature stable. Keep lights off to prevent algae blooms while you wait.
The process is boring but it works. Test, dose, wait. That’s really all there is to it. The bacteria do their job if you give them time.
Using Live Rock vs. Dry Rock for Cycling
Your rock choice affects cycle speed and what else you might bring into the tank.
Live rock comes from the ocean and already has bacteria, pods, and other microfauna. It can cut cycle time in half—sometimes down to 2-3 weeks. But it’s expensive and you might get unwanted hitchhikers like mantis shrimp, aiptasia anemones, or bristle worms. Some are harmless, others become pests.
Dry rock is artificial or fossilized rock with no life on it. It’s cheaper, pest-free, and lets you start clean. But bacteria need time to colonize it, so cycling takes longer unless you use bottled bacteria.
My take: If you want a faster cycle and can handle potential pests, go with live rock. If you’re on a budget or want full control, use dry rock with a bacteria starter. Either way works, just know the tradeoffs.
Bottled Bacteria Additives: Do They Work?
Yes, most do. Products like Bio-Spira, Dr. Tim’s One and Only, and MicroBacter7 contain live nitrifying bacteria that can jump-start a cycle. I’ve used Bio-Spira in a few tanks and seen cycles complete in under two weeks.
But they aren’t magic. Bottled bacteria still need correct temperature, enough ammonia, and stable water chemistry to grow. If your tank is 65°F or you’re using tap water, they’ll die before establishing.
Treat them as a booster, not a shortcut. Follow the instructions: dose the bacteria, add ammonia, test regularly. They can shave weeks off the cycle if conditions are right.
Bio-Spira is reliable with live cultures. Dr. Tim’s is also excellent. Both are products I’ve used with consistent results.
How to Test Your Water During the Cycle
Testing is your only window into what’s happening in the tank. Test every 2-3 days for ammonia, nitrite, and nitrate. Use liquid test kits, not strips. Strips can be off by 50% or more.
Here’s what the cycle looks like in test results:
- Week 1-2: Ammonia spikes to 2-4 ppm. Nitrite and nitrate at zero.
- Week 2-4: Ammonia starts dropping. Nitrite spikes. Nitrate may start appearing.
- Week 3-5: Ammonia hits zero. Nitrite spikes high, then starts dropping. Nitrate is clearly present.
- Week 4-8: Ammonia and nitrite both at zero. Nitrate reading confirms the cycle is done.
A common mistake is testing only once a week. You’ll miss the intermediate changes. Every 2-3 days is the sweet spot. Also read the test instructions carefully—some require shaking the reagent bottle vigorously, and skipping that step gives wrong results.
A good master test kit covers ammonia, nitrite, nitrate, and pH. That’s all you need for cycling.

Common Mistakes to Avoid When Cycling
Here’s what I see trip up beginners most often:
- Adding fish too early. Even if ammonia and nitrite read low, your bacteria colony isn’t robust yet. Wait for the full cycle to finish.
- Overdosing ammonia. More isn’t faster. Too much ammonia (over 5 ppm) can stall the cycle for weeks.
- Neglecting temperature. Bacteria are temperature-sensitive. A drop to 70°F slows their metabolism way down. Keep the heater steady.
- Using tap water. Chlorine and chloramines kill bacteria. Always use RO/DI water.
- Dirty equipment. Don’t use a bucket that had detergent in it. Residue can be toxic. Dedicated equipment is best.
- Performing water changes. During cycling, you remove the ammonia bacteria need. Don’t change water until the cycle finishes.
I see the “overdosing ammonia” mistake all the time in forums. People think adding more will grow bacteria faster. It doesn’t. Stick to 2-4 ppm and be patient.
How to Tell When Your Tank Is Fully Cycled
The signs are clear if you know what to look for:
- Ammonia reads 0 ppm.
- Nitrite reads 0 ppm.
- Nitrate is present (any reading above 0 confirms the cycle worked).
But here’s the definitive test: dose 2 ppm of pure ammonia. If both ammonia and nitrite drop to 0 within 24 hours, your tank is cycled. This proves the bacteria can handle a sudden bioload.
Don’t rely on a single reading. Test over 3-4 days to confirm the pattern is stable. Once you see that pattern, the cycle is done. You’re ready to move forward.
What to Do Immediately After the Cycle Completes
Now that the cycle is done, you’re not completely off the hook. Here’s what comes next:
- Do a partial water change. Remove 20-30% of the water and replace with fresh saltwater mixed to the same salinity. This drops nitrates to a safe level.
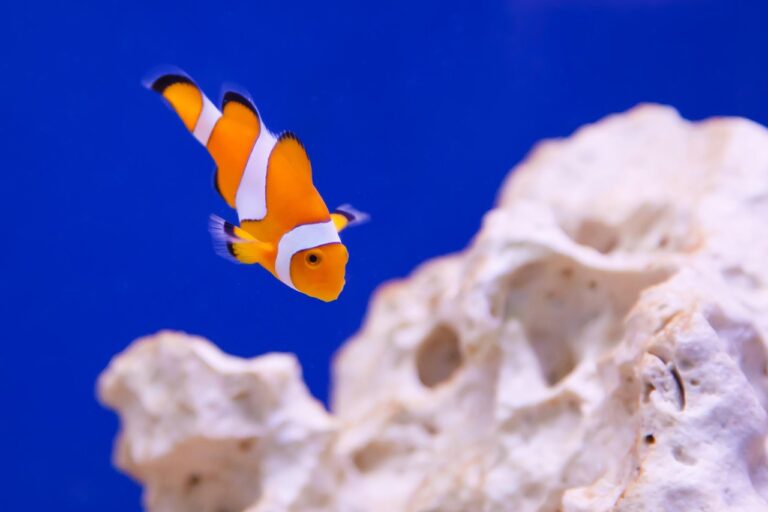
- Add your first fish. Choose 1-2 hardy, small specimens. Clownfish, chromis, or a blenny are excellent choices. Don’t go overboard—the biological filter is strong but not infinite.
- Monitor closely. Test ammonia and nitrite daily for the first week. A small spike after adding fish is normal and should clear within 24 hours.
- Feed sparingly. Overfeeding is the #1 cause of ammonia spikes after cycling. Feed tiny amounts once a day for the first week.
- Avoid adding multiple fish at once. Stagger additions by 2-3 weeks to let the bacteria colony adjust to the increased bioload.
The cycle doesn’t end when the test reads zero. The bacteria colony needs time to mature. Be cautious with new additions and keep testing.
Final Thoughts: Patience Is the Secret to Success
Cycling a saltwater aquarium tests your patience—that’s the whole point. It’s the first lesson in reef keeping: you can’t rush nature.
Fishless cycling is the ethical, safe, and recommended method for every beginner. Good test kits, a steady ammonia source, and consistent temperature are all you need. Bottled bacteria help but aren’t required.
I’ve seen tanks that were cycled poorly crash months later. I’ve also seen tanks that were cycled properly thrive for years with minimal issues. Your success starts with this one step.
Take your time. Test often. When you finally add that first fish, you’ll know you gave it the best possible start. That’s a feeling worth waiting for.